
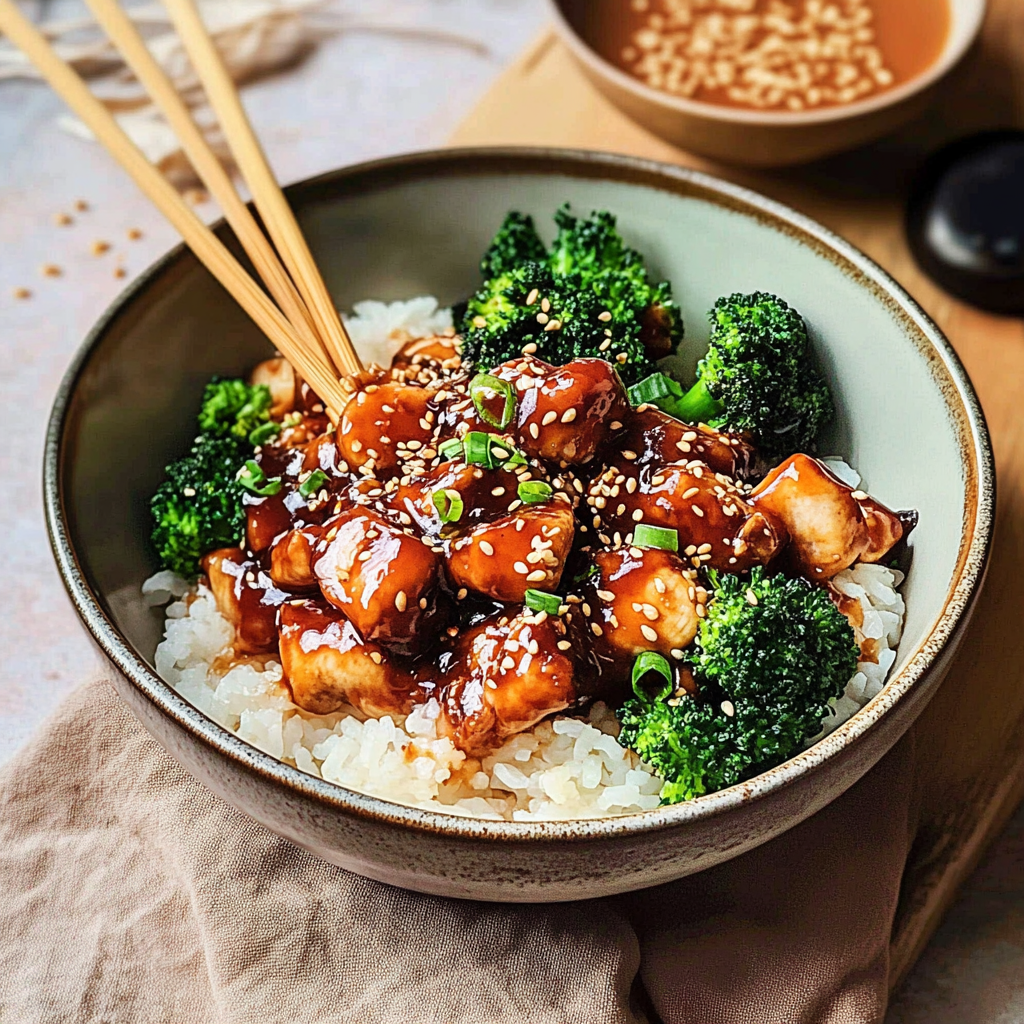
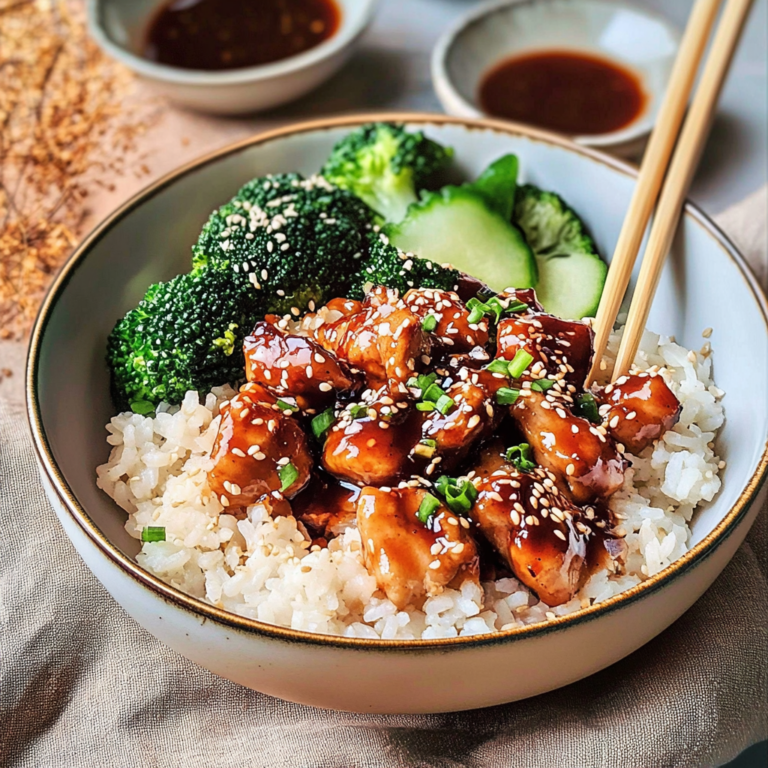
Catch the aroma of tender, sticky chicken glistening with a sweet and savory glaze that dances on your taste buds. The Sticky Chicken Rice Bowls that’s better than takeout will have you dreaming about your next meal long before it arrives.
Picture this: a weeknight dinner that feels like a restaurant experience but is made right in your kitchen. Memories of family gatherings and delicious flavors flood back as you take that first bite. This dish is not just food; it’s comfort wrapped in rice and chicken goodness, perfect for cozy nights or when you’re craving something truly special.
Why You'll Love This Recipe
- This amazing chicken marinade offers more than just flavor; it makes meal prep a breeze.
- You can easily customize the ingredients based on what you have on hand.
- The vibrant colors and aromas make it visually stunning on any dinner table.
- Perfect for grilling but versatile enough for baking or pan-searing.
Ingredients for Sticky Chicken Rice Bowls That’s Better Than Takeout
Here’s what you’ll need to make this delicious dish:
- Boneless, Skinless Chicken Thighs: These juicy pieces are perfect for absorbing flavor and staying tender during cooking.
- Fresh Ginger: Use a knob of ginger for a zesty kick; peel it for the freshest taste.
- Garlic Cloves: A few cloves add depth and an irresistible aroma to your chicken.
For the Sauce:
- Low-Sodium Soy Sauce: This sauce brings umami to your dish without overwhelming saltiness.
- Honey or Maple Syrup: Either sweetener adds stickiness while balancing the salty soy sauce.
- Rice Vinegar: It brightens up the sauce with a hint of acidity, enhancing all those lovely flavors.
For Serving:
- Cooked Rice: White or brown rice works beautifully as a base for soaking up all that scrumptious sauce.
- Fresh Vegetables: Think bell peppers, carrots, or broccoli to add color and crunch to your bowl.
The full ingredients list, including measurements, is provided in the recipe card directly below.
How to Make Sticky Chicken Rice Bowls That’s Better Than Takeout
Follow these simple steps to prepare this delicious dish:
Step 1: Marinate the Chicken
Start by combining soy sauce, honey (or maple syrup), minced garlic, minced ginger, and rice vinegar in a bowl. Add the chicken thighs to the marinade and toss until they’re well coated. Let them soak in all those flavors for at least 30 minutes or longer if you can wait!
Step 2: Cook the Chicken
Heat a skillet over medium heat and add a tablespoon of oil. Once hot, remove excess marinade from the chicken and place it in the skillet. Cook each side for about five minutes until golden brown and cooked through. Your kitchen will smell divine!
Step 3: Make Extra Sauce
While the chicken cooks, pour the leftover marinade into another pot over medium heat. Bring it to a gentle boil and let it simmer until thickened slightly (about five minutes). This will be drizzled over your finished dish.
Step 4: Prepare the Rice
Cook your choice of rice according to package instructions while the chicken is sizzling away. Fluffy rice is essential for soaking up all that sticky goodness!
Step 5: Assemble Your Bowls
In each bowl, place a generous scoop of cooked rice. Slice your sticky chicken into bite-sized pieces and arrange them on top of the rice like tasty little nuggets of joy.
Step 6: Add Veggies & Drizzle Sauce
Top off each bowl with fresh veggies like sliced bell peppers or steamed broccoli. Finally, drizzle that luscious extra sauce over everything—it’s like icing on a cake but way more savory!
Transfer to plates and drizzle with sauce for the perfect finishing touch.
Now go ahead—take a moment to admire your masterpiece before diving in! Those Sticky Chicken Rice Bowls are not just better than takeout; they’re made with love right at home! Enjoy every last bite!
You Must Know
- This amazing chicken marinade offers more than just flavor; it makes meal prep a breeze.
- You can easily customize the ingredients based on what you have on hand.
- The vibrant colors and aromas make it visually stunning on any dinner table.
- Perfect for grilling but versatile enough for baking or pan-searing.
Perfecting the Cooking Process
Sear the chicken first to lock in those juicy flavors, then cook your rice while preparing the sticky sauce. It’s all about timing; multitasking will keep your kitchen chaos to a minimum.
Add Your Touch
Feel free to swap out vegetables based on what’s lurking in your fridge. Want a spicy kick? Toss in some chili flakes. Prefer a sweeter note? Add pineapple chunks for a tropical twist.
Storing & Reheating
Store leftovers in an airtight container in the fridge for up to three days. To reheat, microwave until hot or heat gently on the stove, adding a splash of broth if needed.
Chef's Helpful Tips
- For perfect sticky chicken rice bowls, marinate overnight for deeper flavor and tenderness.
- Avoid overcrowding the pan while searing—this ensures that glorious caramelization happens!
- Lastly, always taste as you go to adjust flavors to your liking.
The first time I made these sticky chicken rice bowls, my friends declared it “better than takeout.” Their faces lit up as they devoured each bite, and I felt like a culinary genius!
FAQs:
What are Sticky Chicken Rice Bowls That’s Better Than Takeout?
Sticky Chicken Rice Bowls That’s Better Than Takeout are a delicious and satisfying meal option. They feature tender chicken cooked with a sticky, sweet sauce served over fluffy rice. The dish is customizable with various vegetables and garnishes, making it a versatile choice for any dinner table. By preparing this recipe at home, you avoid the preservatives often found in takeout meals while enjoying fresh flavors.
How can I make my Sticky Chicken Rice Bowls healthier?
To make your Sticky Chicken Rice Bowls healthier, consider using brown rice instead of white rice for added fiber. Incorporate plenty of colorful vegetables like bell peppers, broccoli, and carrots to enhance nutritional value. You can also reduce the sugar content in the sauce or opt for low-sodium soy sauce. These small changes will keep the dish flavorful while improving its overall health profile.
Can I use other meats in Sticky Chicken Rice Bowls?
Absolutely! While the recipe focuses on chicken, you can easily substitute it with beef, turkey, or lamb to suit your taste preferences. Each protein brings a unique flavor to the dish, allowing you to experiment and find your favorite version. Just ensure that cooking times may vary based on the meat chosen, so adjust accordingly for optimal tenderness.
What side dishes pair well with Sticky Chicken Rice Bowls?
Sticky Chicken Rice Bowls pair wonderfully with a variety of side dishes. Fresh salads with light dressings complement the richness of the main dish well. Steamed vegetables or sautéed greens add a nutritious touch without overpowering flavors. You could also serve spring rolls or dumplings for an Asian-inspired meal that enhances your dining experience without taking away from the star of the show.
Conclusion for Sticky Chicken Rice Bowls That’s Better Than Takeout:
In conclusion, Sticky Chicken Rice Bowls That’s Better Than Takeout offer a delightful blend of flavors and textures that you can easily create at home. This dish allows for customization based on personal preferences and dietary needs while ensuring freshness and quality ingredients. By following this simple recipe, you can enjoy a satisfying meal that rivals your favorite takeout options without the guilt. Enjoy making these bowls part of your regular meal rotation!
Sticky Chicken Rice Bowls That’s Better Than Takeout
Sticky Chicken Rice Bowls are the ultimate comfort food, featuring tender boneless chicken thighs marinated in a sweet and savory sauce, served over fluffy rice. This delightful dish brings restaurant-quality flavors straight to your kitchen, making it perfect for busy weeknights or cozy gatherings. Customize with vibrant vegetables for added color and crunch, and enjoy a satisfying meal that will delight your family and friends.
- Total Time: 35 minutes
- Yield: Serves 4
Ingredients
- 1 lb boneless, skinless chicken thighs
- 2 tbsp low-sodium soy sauce
- 2 tbsp honey or maple syrup
- 1 tbsp rice vinegar
- 3 cloves garlic, minced
- 1 knob fresh ginger, peeled and minced (about 1 tbsp)
- 2 cups cooked white or brown rice
- 1 cup fresh vegetables (bell peppers, broccoli, or carrots)
Instructions
- 1. Marinate the chicken: In a bowl, whisk together soy sauce, honey (or maple syrup), minced garlic, minced ginger, and rice vinegar. Add chicken thighs and coat well. Let marinate for at least 30 minutes.
- 2. Cook the chicken: Heat oil in a skillet over medium heat. Remove excess marinade from the chicken and cook for about 5 minutes on each side until golden brown and cooked through.
- 3. Make the sauce: Pour leftover marinade into another pot. Bring to a gentle boil and simmer until thickened, about 5 minutes.
- 4. Prepare the rice: Cook rice according to package instructions while chicken is cooking.
- 5. Assemble bowls: Place cooked rice in each bowl, top with sliced chicken, fresh veggies, and drizzle with extra sauce.
- Prep Time: 15 minutes
- Cook Time: 20 minutes
- Category: Main
- Method: Skillet
- Cuisine: American/Asian
Nutrition
- Serving Size: 1 bowl (approximately 400g)
- Calories: 560
- Sugar: 12g
- Sodium: 800mg
- Fat: 20g
- Saturated Fat: 4g
- Unsaturated Fat: 14g
- Trans Fat: 0g
- Carbohydrates: 60g
- Fiber: 4g
- Protein: 36g
- Cholesterol: 150mg
Keywords: - For deeper flavor, marinate overnight if time allows. - Swap out vegetables based on what’s available; try adding chili flakes for spice or pineapple chunks for sweetness. - Store leftovers in an airtight container for up to three days.